
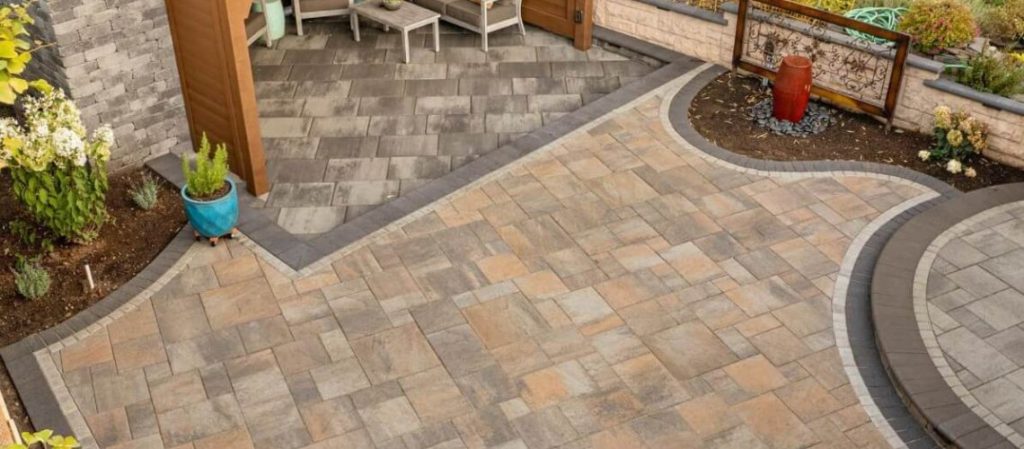
When it comes to enhancing the aesthetic appeal and functionality of your outdoor spaces, few things can rival the transformative power of paver installation. Pavers, available in various materials and styles, offer a versatile solution for driveways, patios, walkways, and more. In this comprehensive guide, we’ll walk you through the essential steps of paver installation, ensuring that your project not only looks stunning but also stands the test of time.
Understanding the Basics of Paver Installation
Introduction to Pavers
Pavers, commonly made of materials like concrete, natural stone, or clay brick, are individual units designed for easy installation. Their interlocking nature provides stability, making them an ideal choice for various outdoor applications.
Benefits of Paver Installations
Paver installations come with a host of benefits. They are durable, easy to repair, and offer excellent drainage. Additionally, the variety of colors and patterns available allows for endless design possibilities, adding value to your property.
Popular Applications of Pavers
Pavers find applications in diverse outdoor projects, from driveways and pathways to patios and pool decks. Their adaptability makes them suitable for both residential and commercial landscapes.
Types of Pavers for Your Project
Interlocking Concrete Pavers
Known for their strength and versatility, interlocking concrete pavers are a popular choice. They can withstand heavy loads and are available in various shapes and sizes, offering flexibility in design.
Natural Stone Pavers
For a more natural and timeless look, natural stone pavers are an excellent option. They bring a touch of elegance to outdoor spaces and are prized for their durability.
Clay Brick Pavers
Clay brick pavers lend a classic and charming appearance to driveways and walkways. Their rich color options and durability make them a favorite among homeowners.
Planning Your Paver Project
Assessing the Area
Before diving into the installation process, carefully assess the area where you plan to install pavers. Take note of any slopes, drainage issues, or existing structures that may impact the project.
Choosing the Right Paver Type
Consider the overall design theme and functionality of your space when selecting pavers. Each type comes with its unique characteristics, so choose the one that aligns with your aesthetic preferences and practical needs.
Calculating Materials and Costs
To avoid surprises midway through your project, calculate the materials needed and estimate costs accurately. This includes pavers, base materials, edge restraints, and any additional features you plan to incorporate.
Preparing the Site for Installation
Site Excavation and Grading
Prepare a stable foundation for your pavers by excavating the site and ensuring proper grading. This step is crucial for preventing settling and ensuring uniformity in the finished surface.
Installing Edge Restraints
Edge restraints are essential for maintaining the integrity of your paver installation. They prevent shifting and spreading, keeping the pavers in place over time.
Necessary Drainage Considerations
Proper drainage is key to preventing water accumulation and potential damage to your paver project. Incorporate drainage solutions like permeable pavers or a well-designed slope to direct water away from the installation.
Step-by-Step Paver Installation Guide
Base Preparation
The foundation of your paver installation is the base. Ensure it is well-compacted and provides a stable surface for the pavers. A properly prepared base contributes significantly to the longevity of your project.
Laying the Pavers
Carefully lay the pavers according to your chosen pattern. Take your time to achieve a level surface, and use string lines or guides to maintain straight lines and consistent spacing between pavers.
Sand Bedding and Compaction Techniques
Create a smooth and stable surface by adding a layer of sand over the laid pavers. Compact the pavers and sand to ensure a tight fit and reduce the risk of settling.
Cutting and Shaping Pavers for a Perfect Fit
Tools Required for Cutting Pavers
Invest in the right tools for cutting and shaping pavers. A wet saw or a splitter can help achieve clean and precise cuts, ensuring a professional finish to your project.
Tips for Precise Cutting
Take your time when cutting pavers, and measure twice before making any cuts. Precision is crucial for achieving a seamless look, especially when dealing with intricate patterns or curves.
Dealing with Curves and Angles
If your project involves curves or angles, plan the layout carefully. Use flexible edge restraints for curves and consider dry-fitting the pavers before permanent installation to ensure a perfect fit.
Ensuring Durability with Proper Jointing
The Importance of Proper Jointing
Proper jointing is essential for the stability and durability of your paver installation. Well-maintained joints prevent shifting and minimize the risk of weed growth between pavers.
Types of Jointing Materials
Choose the right jointing material based on your project and personal preferences. Common options include polymeric sand, which hardens when moistened, or traditional sand for a more natural look.
Jointing Techniques for Longevity
Apply jointing material carefully, making sure it fills the gaps completely. Compact the material into the joints and sweep away excess to create a flush and even surface.
Adding Finishing Touches to Your Paver Installation
Sealing Pavers for Protection
Consider applying a sealer to protect your pavers from stains, color fading, and weathering. Sealing also enhances the colors, giving your installation a vibrant and polished appearance.
Choosing the Right Sealant
Select a sealant based on the type of pavers you’ve installed. Consult with your supplier or a professional for recommendations on the best sealer for your specific project.
Enhancing Aesthetics with Borders and Patterns
Add a personal touch to your paver project by incorporating borders or unique patterns. This not only enhances the visual appeal but also adds a sense of creativity to your outdoor space.
Common Issues and Troubleshooting
Dealing with Uneven Pavers
If you notice any unevenness in your paver installation, address it promptly. Lift the affected pavers, re-level the base, and reinstall them for a smooth and uniform surface.
Repairing Cracked or Chipped Pavers
Accidents happen, but they don’t have to be permanent. Replace cracked or chipped pavers by carefully lifting the surrounding ones and installing new ones in their place.
Handling Weed Growth Between Pavers
Prevent and manage weed growth by using a quality weed barrier during installation. If weeds do appear, address them promptly by removing them and applying an appropriate herbicide.
Maintaining Your Paver Installation for Longevity
Regular Cleaning and Sweeping Tips
Keep your paver installation looking pristine by regularly sweeping away debris and dirt. Periodic cleaning with a mild detergent and water can help remove stains and enhance the overall appearance.
Seasonal Maintenance Checklist
Follow a seasonal maintenance routine to address specific challenges, such as snow removal in winter or adjusting jointing material after heavy rainfall. A proactive approach ensures the longevity of your paver installation.
Addressing Stains and Discoloration
Stains and discoloration can occur over time. Address these issues by identifying the cause of the problem and using appropriate cleaning solutions. Sealing your pavers can also help prevent future stains.
FAQs
Q1: What are the benefits of choosing pavers for my outdoor project?
A1: Pavers offer durability, versatility, and a wide range of design options. They are resistant to cracking, provide excellent drainage, and can be easily repaired if necessary.
Q2: How do I choose the right type of paver for my project?
A2: Consider the overall design, the intended use of the space, and your personal preferences. Interlocking concrete pavers are durable, natural stone pavers offer a timeless look, and clay brick pavers add classic charm.
Q3: Do I need professional help for paver installation, or can I do it myself?
A3: While DIY is possible, it’s crucial to have a good understanding of the process. If you’re unsure or the project is extensive, consulting with a professional can ensure a successful installation.
Q4: What’s the importance of proper base preparation?
A4: The base provides stability for your paver installation. A well-prepared base ensures a level surface, reduces settling, and contributes significantly to the longevity of the project.
Q5: Can I install pavers over an existing concrete surface?
A5: Yes, it’s possible to install pavers over concrete if the surface is in good condition. However, proper preparation, including cleaning and adding a layer of sand, is essential for a successful installation.
Q6: How do I deal with weed growth between pavers?
A6: Prevent weed growth by using a quality weed barrier during installation. If weeds appear, remove them promptly and consider applying a herbicide. Regular maintenance also helps minimize weed issues.
Q7: Is sealing necessary for paver installations?
A7: Sealing is not mandatory but highly recommended. It protects pavers from stains, color fading, and weathering. Choose a suitable sealer based on the type of pavers and your preferences.
Q8: Can I cut pavers myself, or should I hire a professional?
A8: You can cut pavers yourself using the right tools, such as a wet saw or splitter. Take necessary safety precautions, and if the project involves complex cuts, seeking professional assistance may be beneficial.
Q9: How do I address uneven pavers in my installation?
A9: Lift the uneven pavers, re-level the base, and reinstall them. Taking care of unevenness promptly ensures a smooth and uniform surface.
Q10: What is the expected lifespan of a paver installation?
A10: With proper installation and maintenance, paver installations can last for decades. Regular cleaning, sealing, and addressing issues promptly contribute to their long-term durability.
Conclusion
Embarking on a paver installation project can be a rewarding endeavor, transforming your outdoor spaces into inviting and functional areas. By following this comprehensive guide, you’ll not only achieve a stunning result but also ensure the longevity of your investment. Remember, each step plays a crucial role in the overall success of your paver installation, so take your time, plan carefully, and enjoy the process of creating a beautiful outdoor space that reflects your style and enhances your lifestyle. Happy paving!
Pingback: Affordable Paver Installation Costs for Stunning Outdoor